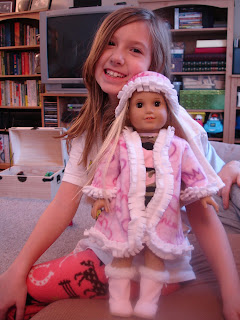
I have all the photos ready for the fleece fringe tutorial and I know I mentioned a doll snuggie in my previous post. Those need to take a backseat for the moment. Elf's first Brownie scout meeting of 2010 is tomorrow. And, what is a slightly off her rocker ("slightly" is debatable, I know) sewing mama to do?
Yep. Julie needed a sash! Julie is apparently a busy girl who comes straight home from skating to bake then on to Brownies without even a moment to brush her hair. Anyway....
Yes, it's madness. But if you or someone you know is inclined to share it with me, here you go:
Here's what you'll need.
a) 1/4 yd of brown fabric - it can be as heavy as twill or woven cotton quilting fabric. I used an inexpensive quilting solid. b) your own little darling's sash c) printable fabric sheets d) Heat n Bond or something like it. *** You can combine C and D by buying iron on printable fabric, but I already had the Heat n Bond and the plain fabric is significantly cheaper.***
First, you need to scan your real-life Brownie's sash (or if you haven't sewn them on yet, the badges). Yes, just lay it on the scanner and make a few scans getting all the badges you want. C'mon, if you're participating in this, it's not the weirdest thing you've ever done. Maybe not even today.
My scanner automatically sized everything to fit on a standard sheet of printer paper. But if you need to manually set the size, you want the scanned badges to be about 55% of the original size. I cut and pasted the badges from the various scans into one document and printed on the paper according to the package directions. *** Keep in mind that unless you specifically buy the colorfast fabric sheets, you won't be able to wash your doll's sash. Hopefully you wouldn't need to anyway.***
Fuse the Heat n Bond to the wrong side of the fabric according to the directions. I cut the Heat N Bond a little larger than the fabric to make sure the adhesive covers everything. **Tip: place your fabric face down on a plain sheet of paper rather than directly on your ironing board. The extra adhesive will stick to the paper rather than your board. (Too bad I thought of this AFTER I got adhesive on my much abused ironing mat - again.) You can cut out the badges individually or leave them in groups. It's up to you.
Now print
the pattern and cut a) two on the fold if you're using a lightweight quilting fabric b) one (on the fold) if you're using a twill. Use cutting line B for a two layered sash and A for a single layer.
If you're using a heavier fabric and making a one layer sash, finish the long edges with a rolled or very narrow hem.
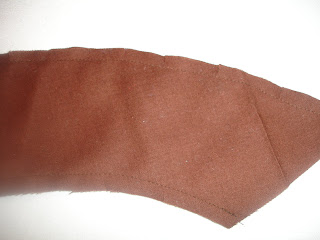
If, like me, your fabric is lighter and you're making a two layer sash, stitch the two layers right sides together (there may be no difference between the right and wrong side of the fabric) with a 1/4" seam allowance. Clip the seam allowances, turn and press. Topstitch 1/8 - 1/4" from the edges.
No matter how you've handled the long edges, now fold your sash in half like this:
and stitch the short ends together. You can serge them or, like I did, just use a regular machine and finish the edge with an overlock or zig-zag stitch.
Now you're ready to iron on the badges! Use the original for placement and iron on the badges according to the directions on the Heat n Bond package. You *could* stitch around the edges of each badge for a really authentic look, but I chose to end the lunacy here. (Of course, there are council specific badges and the troop numbers that go on the front, but I've left those off for now to protect Elf's privacy.)
And you're done! Your friends will think you're either brilliant or deranged, but your Brownie will think you're a rock star! And really, that's the whole point, right?


